Introduction
One of my previous articles, Deploying Microservices Application on the Minikube Kubernetes cluster | My Public Notepad, shows how to use kubectl to deploy a microservices application (Cats/Dogs Voting application) onto a single-node cluster which runs in VM on the local machine and which is created by Minikube.
In Provisioning multi-node cluster on the local machine using Kubeadm and Vagrant | My Public Notepad it is discussed how to use Vagrant to launch multiple VMs on the local machine, each of them hosting a node from the multi-node cluster created and managed by Kubeadm.
The next example would be using Kubeadm to provision multi-node cluster running on multiple bare-metal machines and then using kubectl to deploy a microservices application on that cluster. That will be a topic for one of my future articles but today I want to share my experience with using AWS Console to provision a multi-node cluster in Amazon Elastic Kubernetes Service (EKS) and then kubectl to deploy a microservices application (Cats/Dogs Voting application) onto it.

I will try to maximise use of AWS Free Tier but note that this setup will incur some charges and therefore make sure you destroy chargeable resources (I'll list them down in the article) as soon as successfully complete the test of the application deployment.
Prerequisites:
- AWS:
- An account is created
- IAM User that kubectl will be using to authenticate to AWS. As I'm planning later to use Terraform to provison the infrastructure for a similar demo, I created IAM user named terraform but in this article we won't be using Terraform at all and this user name can be any arbitrary name.
- For simplicity, it can have AdministratorAccess - AWS Managed Policy attached to it but bear in mind that the best practice is to follow the Principle of least privilege
- IAM user name is arbitrary e.g. terraform
- IAM user has access key created (key ID and secret) and they are added to ~/.aws/credentials under user's profile
- Local machine:
- AWS CLI is installed and configured
- kubectl is installed
Creating a cluster in EKS Dashboard in AWS Console
We'll perform the following steps in order to create an EKS cluster:
- create IAM role for cluster
- create a cluster
- crate IAM role for (worker) nodes
- create (worker) node group
This is how looks the main EKS page:

As Getting started with Amazon EKS – AWS Management Console and AWS CLI - Amazon EKS and Amazon EKS cluster IAM role - Amazon EKS describe, before we create a cluster we need to create an IAM Role which needs to have these two policies attached:
1) AmazonEKSServicePolicy - AWS Managed Policy - defines permissions of this role (what resources can access anyone who assumes this role)
2) trust policy (which defines who can assume/take this role). Role needs to have this piece of information attached to it as if anyone could assume it, that would defeat the purpose of roles. We want to allow EKS service to assume it so this policy should be attached to it:
{
"Version": "2012-10-17",
"Statement": [
{
"Effect": "Allow",
"Principal": {
"Service": "eks.amazonaws.com"
},
"Action": "sts:AssumeRole"
}
]
}
We can name this role eksClusterRole.
This is the role in AWS Console:


We can now go back to EKS main page, click on Add cluster and then select Create.
We are now presented with the first out of six steps in creating the cluster with some fields set to default values. Note that cluster service role is also set automatically to the one I created above otherwise it would have been empty. When using AWS Console, make sure that you've selected the desired cluster region in the upper right corner:

Cluster configuration
From the provided info on the AWS Console page:
An Amazon EKS cluster consists of two primary components:
1. The Amazon EKS control plane which consists of control plane nodes that run the Kubernetes software, such as etcd and the Kubernetes API server. These components run in AWS owned accounts.
2. A data plane made up of Amazon EKS worker nodes or Fargate compute registered to the control plane. Worker nodes run in customer accounts; Fargate compute runs in AWS owned accounts.Follow these steps to create an Amazon EKS control plane. After your control plane is created, you can attach worker nodes or use Fargate to run pods.
In this demo we'll be running worker nodes in Amazon EKS, in our account.
Cluster configuration has the following settings:
- Name
- Kubernetes version
- Cluster service role
Let's explore each of them.
Name
- a unique name for this cluster
- we can set it to example-voting-app
Kubernetes version
Kubernetes version for this cluster.
From the AWS Console info:
Kubernetes rapidly evolves with new features, design updates, and bug fixes. In general, the community releases new Kubernetes minor versions (1.XX) approximately every four months. As new Kubernetes versions become available in Amazon EKS, we recommend that you proactively update your clusters to use the latest available version.
After a minor version is first released, it's under standard support in Amazon EKS for the first 14 months. Once a version is past the end of standard support date, it automatically enters extended support for the next 12 months. Extended support allows you to stay at a specific Kubernetes version for longer but at additional cost. If you haven't updated your cluster before the extended support period ends, your cluster is auto-upgraded to the oldest currently supported extended version.We recommend that you create your cluster with the latest available Kubernetes version supported by Amazon EKS. If your application requires a specific version of Kubernetes, you can select older versions. You can do this even for versions that have entered extended support.
We'll leave the value set by default.
Cluster service role
IAM role to allow the Kubernetes control plane to manage AWS resources on your behalf. This property cannot be changed after the cluster is created.
From the AWS Console info:
AWS Identity and Access Management (IAM) is an AWS service that helps an administrator securely control access to AWS resources. An IAM role is an identity within your AWS account that has specific permissions. You can use roles to delegate access to users, applications, or services that do not normally have access to your AWS resources.An Amazon EKS cluster has multiple IAM roles that define access to resources.
- The Cluster Service Role allows the Kubernetes cluster managed by Amazon EKS to make calls to other AWS services on your behalf.
- The Amazon EKS service-linked role includes the permissions that EKS requires to create and manage clusters. This role is created for you automatically during cluster creation.
AWS Console has done job for us and selected the role we created earlier - eksClusterRole.
Cluster access
From the AWS console info:
Kubernetes cluster administrator accessBy default, Amazon EKS creates an access entry that associates the AmazonEKSClusterAdminPolicy access policy to the IAM principal creating the cluster.Any IAM principal assigned the IAM permission to create access entries can create an access entry that provides cluster access to any IAM principal after cluster creation. For more information see Access entries
Bootstrap cluster administrator access
Choose whether the IAM principal creating the cluster has Kubernetes cluster administrator access.Bootstrap cluster administrator access can only be set at cluster creation. If you set the admin bootstrap parameter to True, then EKS will automatically create a cluster admin access entry on your behalf. This parameter can be set independent of cluster authentication mode.
We'll leave here default selection: Allow cluster administrator access for your IAM principal.
Cluster authentication mode
Before using EKS access entry APIs, you must opt in. This can be modified on existing clusters or done when creating new clusters. On an established cluster, changing authentication modes is a one-way operation. You can change between API_AND_CONFIG_MAP and CONFIG_MAP. Then you can change to API from API_AND_CONFIG_MAP. These operations can't be reversed in the opposite direction. Meaning that once you convert to API, you cannot go back to CONFIG_MAP or API_AND_CONFIG_MAP. Additionally, you can't change from API_AND_CONFIG_MAP to CONFIG_MAP.
We'll leave the default selection: EKS API and ConfigMap - The cluster will source authenticated IAM principals from both EKS access entry APIs and the aws-auth ConfigMap.
Secrets encryption
From the AWS Console info:
Once turned on, secrets encryption cannot be modified or removed.Enabling secrets encryption allows you to use AWS Key Management Service (AWS KMS) keys to provide envelope encryption of Kubernetes secrets stored in etcd for your cluster. This encryption is in addition to the Amazon EBS volume encryption that is enabled by default for all data (including secrets) that is stored in etcd as part of an Amazon EKS cluster. Using secrets encryption for your Amazon EKS cluster allows you to deploy a defense in depth strategy for Kubernetes applications by encrypting Kubernetes secrets with a AWS KMS key that you define and manage.Using secrets encryption with AWS KMS to create an encryption key in the same Region as your cluster or use an existing key. You cannot modify or remove encryption from a cluster once it has been enabled. All Kubernetes secrets stored in the cluster where secrets encryption is enabled will be encrypted with the AWS KMS key you provide.
We'll keep the default selection which is OFF/Disabled for Turn on envelope encryption of Kubernetes secrets using KMS - Envelope encryption provides an additional layer of encryption for your Kubernetes secrets.
Tags
For the sake of simplicity, we won't set any tags.
Specify Networking
The next page leads us to EKS cluster networking settings:

Networking
IP address family and service IP address range cannot be changed after cluster creation.Amazon Virtual Private Cloud (Amazon VPC) enables you to launch AWS resources into a virtual network that you have defined. This virtual network closely resembles a traditional network that you would operate in your own data center, with the benefits of using the scalable infrastructure of AWS. A virtual private cloud (VPC) is a virtual network dedicated to your AWS account. A subnet is a range of IP addresses in your VPC. Each Managed Node Group requires you to specify one of more subnets that are defined within the VPC used by the Amazon EKS cluster. Nodes are launched into subnets that you provide. The size of your subnets determines the number of nodes and pods that you can run within them. You can run nodes across multiple AWS availability zones by providing multiple subnets that are each associated different availability zones. Nodes are distributed evenly across all of the designated Availability Zones. If you are using the Kubernetes cluster autoscaler and running stateful pods, you should create one Node Group for each availability zone using a single subnet and enable the -\-balance-similar-node-groups feature in cluster autoscaler.
VPC
A VPC to use for your EKS cluster resources.
We'll use a default VPC which is already selected.
Subnets
Choose the subnets in your VPC where the control plane may place elastic network interfaces (ENIs) to facilitate communication with your cluster.
Choose the subnets in your VPC where the control plane may place elastic network interfaces (ENIs) to facilitate communication with your cluster. The specified subnets must span at least two availability zones.To control exactly where the ENIs will be placed, specify only two subnets, each from a different AZ, and EKS will place cross-account ENIs in those subnets. The Amazon EKS control plane creates up to 4 cross-account ENIs in your VPC for each cluster.You may choose one set of subnets for the control plane that are specified as part of cluster creation, and a different set of subnets for the worker nodes.If you select IPv6 cluster address family, the subnets specified as part of cluster creation must contain an IPv6 CIDR block.
We'll stick to defaults, which a list of all default subnets in default VPC.
Security groups
Security groups to apply to the EKS-managed Elastic Network Interfaces that are created in your control plane subnets.Security groups control communications within the Amazon EKS cluster including between the managed Kubernetes control plane and compute resources in your AWS account such as worker nodes and Fargate pods.The Cluster Security Group is a unified security group that is used to control communications between the Kubernetes control plane and compute resources on the cluster. The cluster security group is applied by default to the Kubernetes control plane managed by Amazon EKS as well as any managed compute resources created through the Amazon EKS API.Additional cluster security groups control communications from the Kubernetes control plane to compute resources in your account.Worker node security groups are security groups applied to unmanaged worker nodes that control communications from worker nodes to the Kubernetes control plane.
We won't be using any security groups. This is not a good practice but we're doing it only for the sake of simplicity.
Choose cluster IP address family
The IP address type for pods and services in your cluster.
Select the IP address type that pods and services in your cluster will receive.Amazon EKS does not support dual stack clusters. However, if your worker nodes contain an IPv4 address, EKS will configure IPv6 pod routing so that pods can communicate with cluster external IPv4 endpoints.
We'll stick to default selection: IPv4
Configure Kubernetes service IP address range
Specify the range from which cluster services will receive IP addresses.Configure the IP address range from which cluster services will receive IP addresses. Manually configuring this range can help prevent conflicts between Kubernetes services and other networks peered or connected to your VPC.Enter a range in IPv4 CIDR notation (for example, 10.2.0.0/16).It must satisfy the following requirements:
- This range must be within an IPv4 RFC-1918 network range.
- Minimum allowed size is /24, maximum allowed size is /12.
- This range cannot overlap with the range of the VPC for your EKS Resources.
- Service CIDR is only configurable when choosing ipv4 as your cluster IP address family. With IPv6, the service CIDR will be an auto generated unique local address (ULA) range.
We won't be using this option.
Cluster endpoint access
Configure access to the Kubernetes API server endpoint
You can limit, or completely disable, public access from the internet to your Kubernetes cluster endpoint.Amazon EKS creates an endpoint for the managed Kubernetes API server that you use to communicate with your cluster (using Kubernetes management tools such as kubectl). By default, this API server endpoint is public to the internet, and access to the API server is secured using a combination of AWS Identity and Access Management (IAM) and native Kubernetes Role Based Access Control (RBAC).You can, optionally, limit the CIDR blocks that can access the public endpoint. If you limit access to specific CIDR blocks, then it is recommended that you also enable the private endpoint, or ensure that the CIDR blocks that you specify include the addresses that worker nodes and Fargate pods (if you use them) access the public endpoint from.You can enable private access to the Kubernetes API server so that all communication between your worker nodes and the API server stays within your VPC. You can limit the IP addresses that can access your API server from the internet, or completely disable internet access to the API server.
We'll use default selection which is: Public and private - The cluster endpoint is accessible from outside of your VPC. Worker node traffic to the endpoint will stay within your VPC.
Advanced settings >> Add/edit sources to public access endpoint
Public access endpoint sources
Determines the traffic that can reach your endpoint.Use CIDR notation to specify an IP address range (for example, 203.0.113.5/32).If connecting from behind a firewall, you'll need the IP address range used by the client computers.By default, your public endpoint is accessible from anywhere on the internet (0.0.0.0/0).If you restrict access to your public endpoint using CIDR blocks, it is strongly recommended to also enable private endpoint access so worker nodes and/or Fargate pods can communicate with the cluster. Without the private endpoint enabled, your public access endpoint CIDR sources must include the egress sources from your VPC. For example, if you have a worker node in a private subnet that communicates to the internet through a NAT Gateway, you will need to add the outbound IP address of the NAT Gateway as part of a allowlisted CIDR block on your public endpoint.
We'll leave a default CIDR block which is set to 0.0.0.0/0.
The next page in EKS cluster setup is about Observability and we'll leave it disabled:

We'll also leave default add-ons:

...and also keep their default settings:

Finally, we can review EKS cluster settings before creating it:

If we click Create, we might get an error like this (in case we used us-east-1 region):

The fix is obvious: remove the subnet which belongs to us-east-1e AZ.
Our cluster is now in process of creation which takes some time (~10 minutes):

Notice the message in the blue ribbon: Managed node group and Fargate profile cannot be added while the cluster example-voting-app is being created. Please wait.
This actually gives us a hint what will actually be the next step: adding Managed Node Group. This is done from Compute tab >> Node Groups >> Add node group but during cluster creation this button is disabled:


We'll add a Managed node group but before that we need to add a new IAM Role, the one which will be used by worker nodes.
Amazon EKS node IAM role - Amazon EKS states that this role needs to have these policies attached:
- AmazonEKSWorkerNodePolicy - AWS Managed Policy
- AmazonEKS_CNI_Policy - AWS Managed Policy
- AmazonEC2ContainerRegistryReadOnly - AWS Managed Policy
- assume role policy (trust policy):
{
"Version": "2012-10-17",
"Statement": [
{
"Effect": "Allow",
"Principal": {
"Service": "ec2.amazonaws.com"
},
"Action": "sts:AssumeRole"
}
]
}
We can name it eksNodeRole:

Let's now click on Add Node Group.
We can name the group as e.g. demo-workers. And we'll leave all settings as set by default.

On the next page we need to specify EC2 instances in the node group:

Node group compute configuration
t2.micro is the only instance type available in free tier BUT it does not meet performance criteria for Kubernetes node (see kubernetes - Pod creation in EKS cluster fails with FailedScheduling error - Stack Overflow, amazon-eks-ami/files/eni-max-pods.txt at pinned-cache · awslabs/amazon-eks-ami). That why we should specify t2.medium or t3.medium.
Node group scaling configuration
EKS is using EC2 Auto-Scaling Groups for scaling up. This is a configuration for Auto-Scaling Group and we can leave 2 as the desired, minimum and maximum number of nodes.

In the next step we can specify subnets:

We can now review the setting and hit the Create button:


Nodes are now created:

I have IAM User named terraform which has Admin privileges and whose profile is in ~/.aws/credentials. Let's set kubectl configuration so this profile is used for authentication with the cluster:
$ aws eks --region eu-west-2 update-kubeconfig --name example-voting-app --profile=terraform
Updated context arn:aws:eks:eu-west-2:471112786618:cluster/example-voting-app in /home/bojan/.kube/config
$ kubectl get deploy,svc
E0531 15:52:54.698454 728981 memcache.go:265] couldn't get current server API group list: the server has asked for the client to provide credentials
E0531 15:52:55.525187 728981 memcache.go:265] couldn't get current server API group list: the server has asked for the client to provide credentials
E0531 15:52:56.374505 728981 memcache.go:265] couldn't get current server API group list: the server has asked for the client to provide credentials
Let's check who has cluster access:

I created this cluster after authenticating to AWS Console via root account. Not the best practice but acceptable for this demo. We need to grant terraform user the access:


Adding access policy is option so let's skip it to check the access without it:


Only adding this user makes it "visible" to the cluster but it still does not have required permissions to access it:
$ aws eks --region eu-west-2 update-kubeconfig --name example-voting-app --profile=terraform
Updated context arn:aws:eks:eu-west-2:471112786618:cluster/example-voting-app in /home/bojan/.kube/config
$ kubectl get deploy,svc
Error from server (Forbidden): deployments.apps is forbidden: User "terraform" cannot list resource "deployments" in API group "apps" in the namespace "default"
Error from server (Forbidden): services is forbidden: User "terraform" cannot list resource "services" in API group "" in the namespace "default"
Let's add access policy which allows terraform user admin privileges over this cluster:


Let's now update kubectl configuration:
$ aws eks --region eu-west-2 update-kubeconfig --name example-voting-app --profile=terraform
Updated context arn:aws:eks:eu-west-2:471112786618:cluster/example-voting-app in /home/bojan/.kube/config
$ kubectl get deploy,svc
NAME TYPE CLUSTER-IP EXTERNAL-IP PORT(S) AGE
service/kubernetes ClusterIP 10.100.0.1 <none> 443/TCP 36m
$ kubectl get nodes
NAME STATUS ROLES AGE VERSION
ip-172-31-24-6.eu-west-2.compute.internal Ready <none> 21m v1.29.3-eks-ae9a62a
ip-172-31-41-85.eu-west-2.compute.internal Ready <none> 20m v1.29.3-eks-ae9a62a
We are now ready to deploy microservices.
Deploying Microservices Application onto Cluster
Let's clone my repository and follow the instructions from README file in https://github.com/BojanKomazec/kubernetes-demo/tree/main/aws-eks/voting-app-via-deployments:
$ kubectl create -f ./minikube/voting-app-via-deployments/deployment/voting-app-deployment.yaml
deployment.apps/voting-app-deploy created
$ kubectl create -f ./aws-eks/voting-app-via-deployments/service/voting-app-service-lb.yaml
service/voting-service created
$ kubectl create -f ./minikube/voting-app-via-deployments/deployment/redis-deployment.yaml
deployment.apps/redis-deploy created
$ kubectl create -f ./minikube/voting-app-via-deployments/service/redis-service.yaml
service/redis created
$ kubectl create -f ./minikube/voting-app-via-deployments/deployment/postgres-deployment.yaml
deployment.apps/postgres-deploy created
$ kubectl create -f ./minikube/voting-app-via-deployments/service/postgres-service.yaml
service/db created
$ kubectl create -f ./minikube/voting-app-via-deployments/deployment/worker-app-deployment.yaml
deployment.apps/worker-app-deploy created
$ kubectl create -f ./minikube/voting-app-via-deployments/deployment/result-app-deployment.yaml
deployment.apps/result-app-deploy created
$ kubectl create -f ./aws-eks/voting-app-via-deployments/service/result-app-service-lb.yaml
service/result-service created
After this, let's list all deployments and services:
$ kubectl get deploy,svc
NAME READY UP-TO-DATE AVAILABLE AGE
deployment.apps/postgres-deploy 1/1 1 1 10m
deployment.apps/redis-deploy 1/1 1 1 10m
deployment.apps/result-app-deploy 1/1 1 1 9m30s
deployment.apps/voting-app-deploy 1/1 1 1 11m
deployment.apps/worker-app-deploy 1/1 1 1 9m40s
NAME TYPE CLUSTER-IP EXTERNAL-IP PORT(S) AGE
service/db ClusterIP 10.100.83.137 <none> 5432/TCP 9m57s
service/kubernetes ClusterIP 10.100.0.1 <none> 443/TCP 49m
service/redis ClusterIP 10.100.6.81 <none> 6379/TCP 10m
service/result-service LoadBalancer 10.100.240.125 aece82f931be943b5a39b5618d5e031e-1908252912.eu-west-2.elb.amazonaws.com 80:32258/TCP 9m1s
service/voting-service LoadBalancer 10.100.141.70 aa5334971f30642dea469ec8d3255e35-790812881.eu-west-2.elb.amazonaws.com 80:32386/TCP 10m
Review created Kubernetes objects
Before we test this application let's explore and view some Kubernetes objects created around this cluster in AWS Console.
Pods in kube-system namespace:

Pods in default namespace:

ReplicaSets:


We can get information for each node in detail:


Namespaces:

API Services:

Services:

db service details:

redis service:


Endpoints:

voting service endpoint:

result service endpoint:

Cluster roles:

Roles:

Cluster overall:

Add-ons:

Node groups:

Reviewing Implicitly Created AWS EC2 Resources
When we create a Kubernetes cluster, EKS is underneath provisioning other AWS services to support Kubernetes architecture and features:
- computing (worker nodes): EC2 instances and Volumes
- LoadBalancing services: EC2 Load Balancers
- auto-scaling feature: EC2 Auto Scaling Groups
- Security Groups

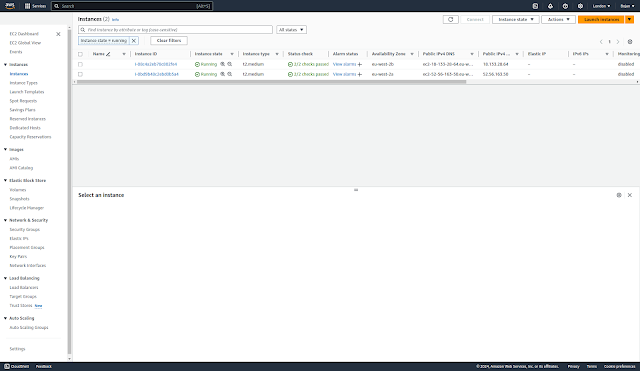
EC2 Instances:
Load balancers:

Listeners:

Network mapping:
Network mapping:

Security:

Health checks:

Target instances:

Monitoring:

LB Attributes:

Auto Scaling Groups:


Volumes:

Security Groups:

Testing the deployment
We saw earlier external IPs for our Voting and Result service which are all behind the load balancer:
- service/voting-service: aa5334971f30642dea469ec8d3255e35-790812881.eu-west-2.elb.amazonaws.com
- service/result-service: aece82f931be943b5a39b5618d5e031e-1908252912.eu-west-2.elb.amazonaws.com
Let's copy these addresses and use http (port 80) protocol in the browser:
http://aa5334971f30642dea469ec8d3255e35-790812881.eu-west-2.elb.amazonaws.com

If we vote for cats we can see the result here:
http://aece82f931be943b5a39b5618d5e031e-1908252912.eu-west-2.elb.amazonaws.com

Let's now vote for dogs:

And then check the result:

Destroying Resources
Let's now destroy cost-bearing infra objects.
We'll start with node group:


WARNING: Make sure Load Balancers created during this exercise are also destroyed.
More general rule: Delete all deployed Kubernetes services before deleting node groups and clusters.
In my case, Load Balancers were left intact after I performed above described deletion of EKS resources.
If you have active services in your cluster that are associated with a load balancer, you must delete those services before deleting the cluster so that the load balancers are deleted properly. Otherwise, you can have orphaned resources in your VPC that prevent you from being able to delete the VPC.
When you create a Service resource with LoadBalancer as a type, EKS asks the ELB service to create an external load balancer. It depends on how you create a Service, but in the end, the ELB service will create a Classic Load Balancer(CLB) or Network Load Balancer(NLB) for you. If you delete the cluster before deleting the Load Balancers first, they will remain in your account, and you may be charged for them.Make sure to delete all load balancers created from within Kubernetes.To find LoadBalancer services:kubectl get svc -A | grep LoadBalancerTo delete a service resource:kubectl -n NAMESPACE delete svc NAME
This is exactly what I missed to do before I deleted the node group and the cluster.
Prior to cluster destruction I should have deleted all LoadBalancer services:
kubectl destroy -f ./aws-eks/voting-app-via-deployments/service/voting-app-service-lb.yaml
service/voting-service created
kubectl destroy -f ./aws-eks/voting-app-via-deployments/service/result-app-service-lb.yaml
service/result-service created
Load Balancers get assigned Public IPv4 address and are chargeable, even if Free Tier is still available.
From Guidance Report | AWS Best Practices Recommendation | Site24x7 Documentation | Online Help Site24x7:
A configured Load Balancer continues to accrue charges, till you delete it.
Today AWS announced new charges for AWS-provided public IPv4 addresses beginning February 1, 2024.Types of AWS public IPv4 addresses1. Amazon Elastic Compute Cloud (EC2) public IPv4 addressesWhen you launch AWS resources in a default Amazon Virtual Private Cloud (VPC), or in subnets that have the auto-assign public IP address setting enabled, they automatically receive public IPv4 addresses from the Amazon pool.2. Elastic IP addressesAn Elastic IP address is a public IPv4 address you can allocate to your AWS account, as opposed to a specific resource.3. Service managed public IPv4 addressesAWS managed services that are deployed in your account, such as internet-facing Elastic Load Balancers, NAT gateways, or AWS Global Accelerators, make use of public IPv4 addresses from the Amazon-owned pool. When you deploy managed services in subnets with the auto-assign public IP option enabled, they automatically receive public IPv4 addresses.4. BYOIP addressesThere is no charge for using your own IPv4 addresses.In the updated CUR you will see two new usage types for public IPv4 addresses:
- PublicIPv4:IdleAddress: shows usage across all public IPv4 addresses that are idle in your AWS account
- PublicIPv4:InUseAddress: shows usage across all public IPv4 addresses that are in-use by your AWS resources. These include EC2 public IPv4 addresses, Elastic IP addresses, and service managed public IPv4 addresses. It does not include BYOIPs, as there is no charge for using BYOIP addresses.
From AWS Free Tier now includes 750 hours of free Public IPv4 addresses, as charges for Public IPv4 begin:
AWS Free Tier for Amazon EC2 applies to in-use public IPv4 address usage. Usage beyond 750 hours per month of in-use public IPv4 address will be charged at $0.005 per IP per hour as announced in this AWS News blog.
While there is no additional charge for creating and using an Amazon Virtual Private Cloud (VPC) itself, you can pay for optional VPC capabilities with usage-based charges.
Also see:
Why am I seeing charges for 'Public IPv4 addresses' when I am under the AWS free tier? | AWS re:Post
I discovered this resource leak when I was checking my AWS costs:


It was not obvious what exactly in VPC was consuming public IPv4 addresses. VPC on its own and its public subnets (even with Auto-assign IPv4 Address enabled) do not incur any costs. But when I checked EC2 resources, I notices I had those 2 Load Balances created as part of today's exercise up and running.


$0.005 x 24h x 2 = $0.24
This is exactly daily charge I was having.
Public IP Insights [View public IP insights - Amazon Virtual Private Cloud], a free feature with in Amazon VPC IP Address Manager (IPAM) also showed that I had some public IP addresses in use:

I've now deleted both Load Balancers:


No comments:
Post a Comment